W3 Total Cache is one of the most popular plugins. There are more than 1 million active installs of the w3 total cache. Today we will discuss W3 Total Cache plugin and it’s settings for the best result in page speed
How W3 Total Cache and Cloudflare improve your page speed?
After choosing a good hosting you need to do the most important improvements for page load time is caching and CDN connection.
Caching speeds up your site by serving static documents rather than progressively rendered substance (which WordPress is loaded with). I realize that sounds a bit jargony, yet all it truly implies is that your web server needs to do less work and can, subsequently, displays your contents faster.
W3 Total Cache does this Caching part very nicely.
CDN increases your site speed by another strategy: content delivery optimization. Without a CDN, each visitor to your webpage needs to download the majority of your files from one area – your site’s data centre.
If they located in Paris, Munich, New York or Mumbai they get your website’s data from the same data centre. But CDN changes that by creating multiple global versions of your data. So then, visitors can download static files like images and videos from the nearest data centre to them, rather than your far-off web server. This physical proximity reduces download times and therefore speeds up your website.
If you Put W3 Total Cache and Cloudflare together it will be a super duo blast for your website’s speed.
How to configure W3 Total Cache
I think you already know how to install a plugin in WordPress and activate that. The reason I am avoiding the installation section because W3 Total Cache has around 13 different options. So you already understand that so many things to say.
I know it sounds crazy. But it is the truth that w3 total cache has a lot of functionalities which confuses users. Let’s Deep Dive into the configuration of w3 total cache:
Step 1: Configure General settings
At the very first configure general settings. In this tab you can enable/disable features of W3 Total Cache:
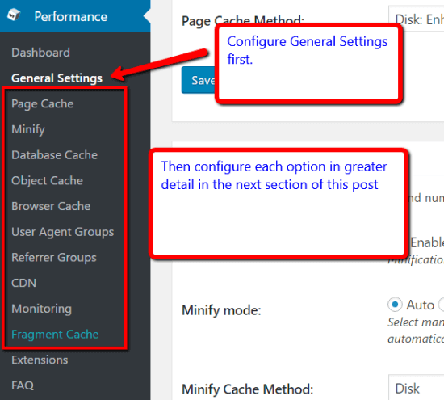
I’ll describe each and every options from top to bottom.
1. General
The first option provides you with the option for automatically enabling all features of W3 Total Cache.
You don’t need to enable all feature automatically because you don’t need every feature. Because not every feature is compatible with your themes and plugins. So you should uncheck this option:
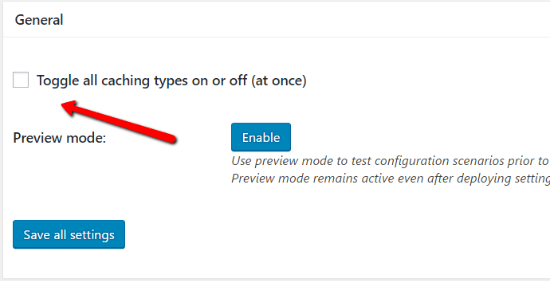
There is also preview mode. Which allows you to see changes before deploying every feature.
2. Page Cache
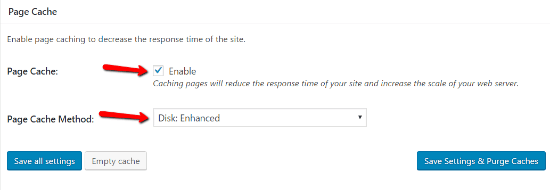
This is one of the most important feature or option of W3 Total Cache.
You must Enable this option. And for the Page Caching Method Option, you should select Disk: Enhanced.
3. Minify
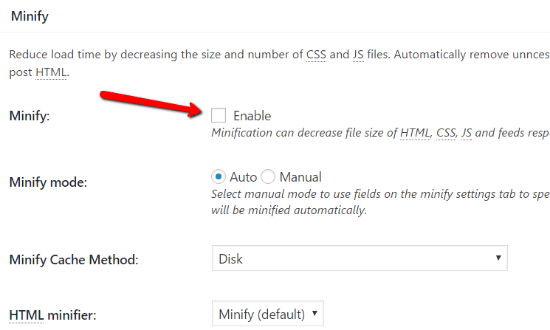
This option you should disable. Because doing minify through plugins could create a problem on your website. You should minify manually. If you don’t know minifying web assets. Then you should read: How to minify HTML, CSS & JS
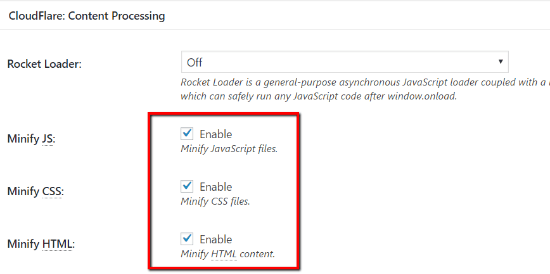
Also Cloudflare supports minify. So do not minify through your W3 Total Cache. We will learn in the cloudflare section how to minify from cloudflare.
4. Database Cache
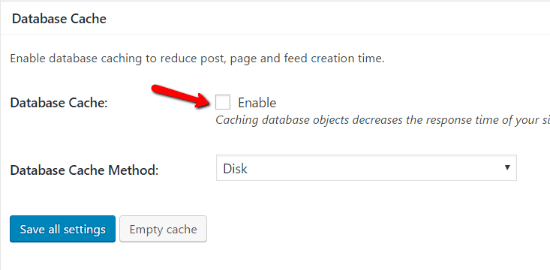
Database is heart of your wp site. In your Database all posts, pages and images are stored. So you should keep it clean for best speed performances.
There are several conflictions between speed optimization experts about Database Caching. Some say you should enable this some says you should disable this.
If you are using VPS then enable Database Caching.
If you are using Shared hosting disable Database Caching. Because database caching can actually slow down your site by offloading too much work to your server’s CPU.
5. Object Cache
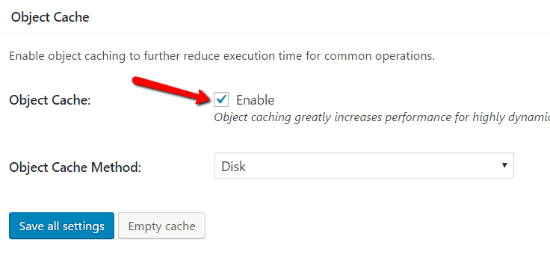
Object Cache also doesn’t good for shared hosting. It offloads CPU too much. Some shared hosting Object Cache suits perfectly. It actually depends on your server. So you should Enable this and test how it fits in your server.
6. Browser Cache
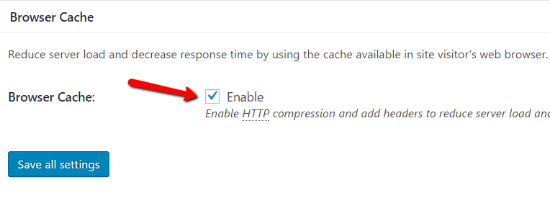
This is the most important option of W3 Total Cache. You definitely Enable this option.
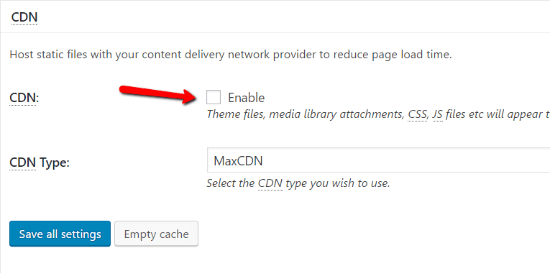
7. CDN
In this feature, you can add CDN. But it won’t have any good impact on the speed of the website. So you should disable CDN.
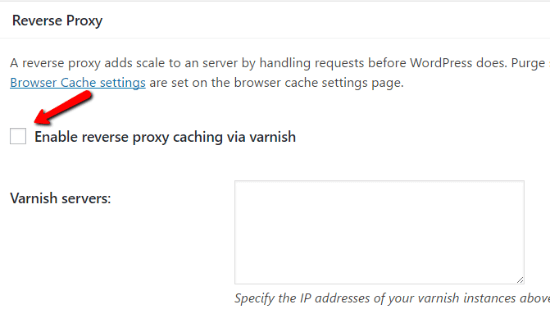
8. Reverse Proxy
Reverse Proxy actually needed for VPS Hosting. It is an advance concept. For non-techy guys, you should leave Disable Reverse Proxy.
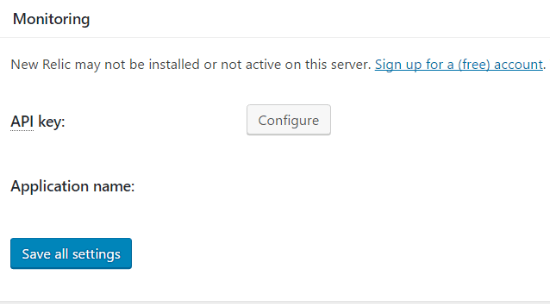
9. Monitoring
We don’t need this section. Just ignore monitoring.
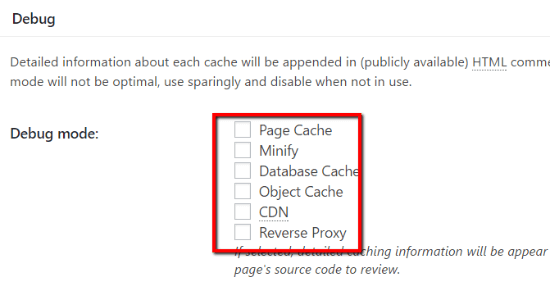
10. Debug
Also, the Debug section is not needed unless you want to test some feature. Unless you disable this.
This is all about General Settings Configuration. In the next step, we will configure each section in detail.
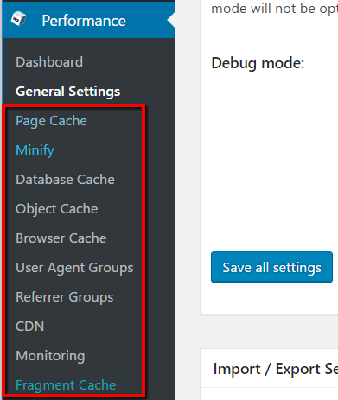
Remember we only need to configure which section we activated or enabled.
Step 2 : Configure page cache
First, go to Page Cache. In the Page Cache settings there are two sections to configure:
1. General
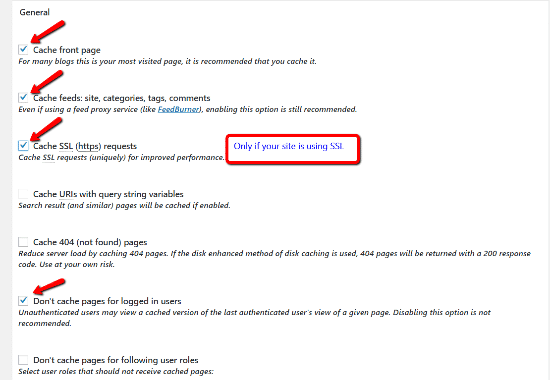
In the General Section of Page Cache Enable the following feature:
- Cache front page
- Cache feeds
- Cache SSL – CloudFlare offers free SSL certificates, so you can enable this box even if you’re not currently using SSL.
- Don’t cache pages for logged in users
2. Cache Preload
Under Cache Preload, make sure you have these settings:
- Automatically prime the page cache: Checked
- Update interval: 900 seconds
- Pages per interval: 10
- Sitemap URL: The actual link to your sitemap if you have one. Typically “yourdomain.com/sitemap.xml” for most SEO plugins.
- Preload the post cache upon publish events: Checked
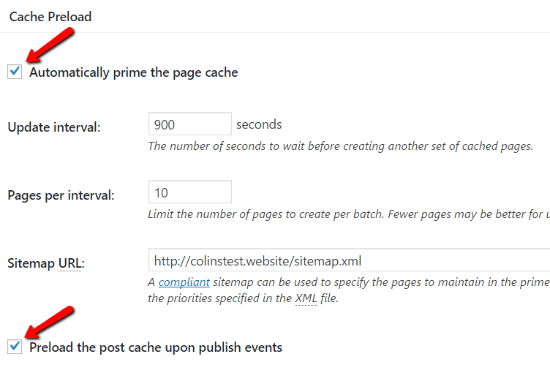
You can safely leave everything else in this section as the default.
Step 3: Configure object cache
Whereas we already did not activate the Minify and Database Caching, so we can skip this two section and jump to the Object Cache settings.
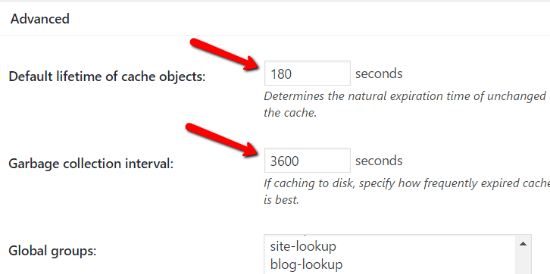
You can leave everything default on this section. Make sure you see these settings:
- Default lifetime of cache objects: 180 seconds
- Garbage collection interval: 3600 seconds
Step 4: Configure browser cache
This is the most important section.
1. General
Under the General options, Make sure to check all of these options:
- Set Last-Modified header: Checked
- Set expires header: Checked
- Set cache control header: Checked
- Set entity tag (eTag): Checked
- Set W3 Total Cache header: Checked
- Enable HTTP (gzip) compression: Checked
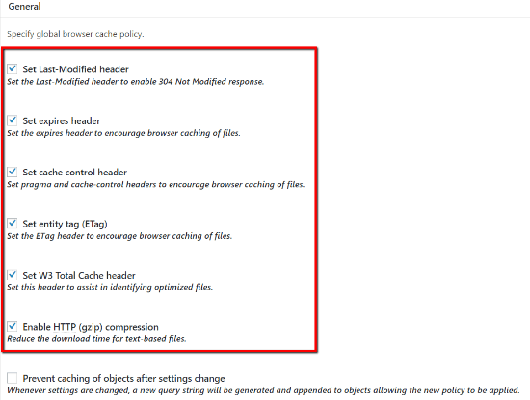
You can leave other general options to default.
Step 5: Installing W3 Total Cache CloudFlare Extension
To install CloudFlare extension in W3 Total Cache follow the steps:
- Go to Extensions page and Activate CloudFlare.
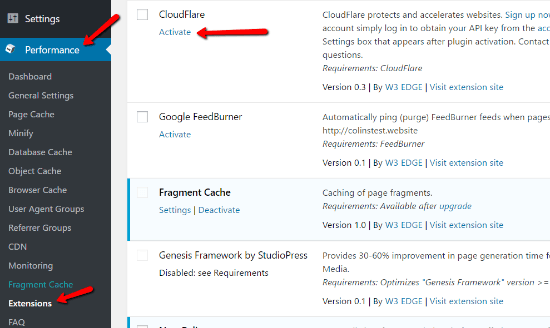
How to set up and configure CloudFlare for WordPress
If you completed the configuration of W3 Total Cache now it is right time to configure CloudFlare.
Grab a Coffee or tea and keep going!!
Step 1: Sign up for a CloudFlare account and select your website
At first, you need an account on CloudFlare. So go to CloudFlare Website and create an account. Then Add your website and click Scan DNS Records:

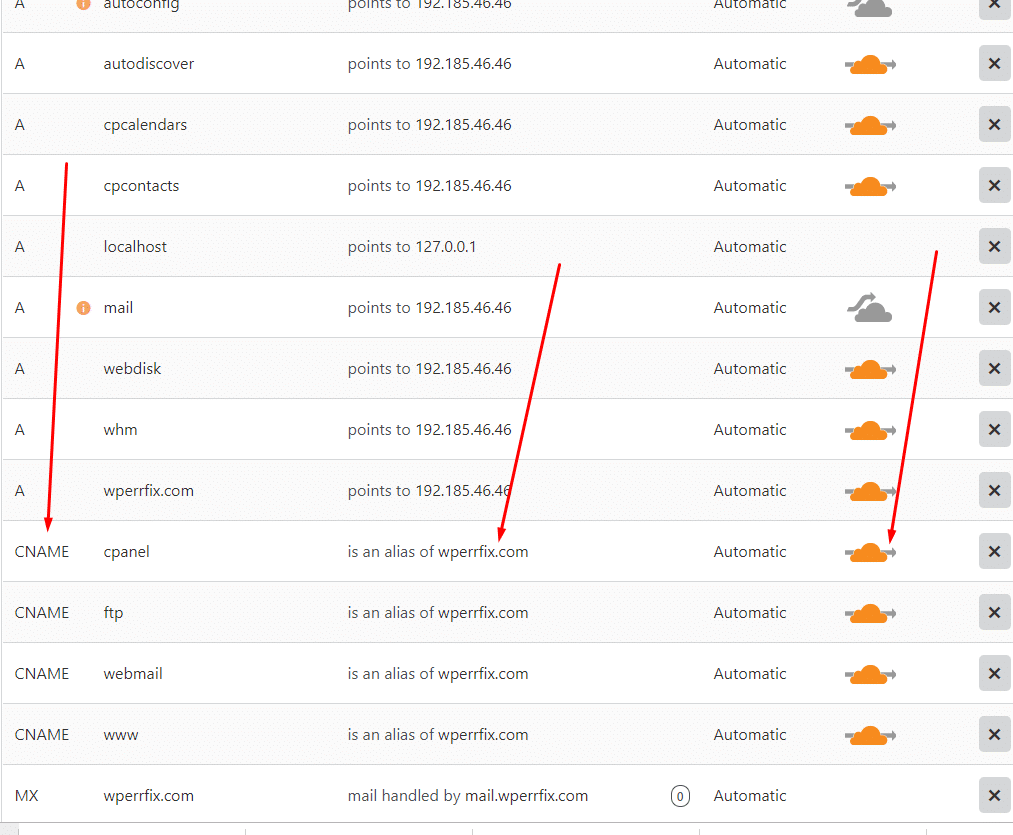
Step 2: Verify your DNS records
In the next step you need to verify your dns records. I understand it seems complicated. If you are a beginnner what you need to do is:
Step 3: Update your nameservers
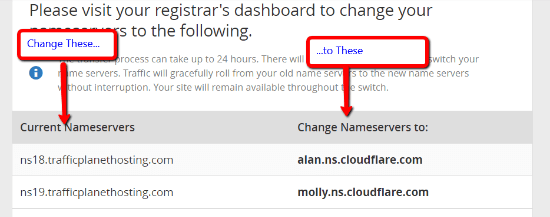
CloudFlare will provide you with two NameServer. All you need to do is just go to your domain panel and update nameservers.
Step 4: Activate CloudFlare in W3 Total Cache
- Go back to W3 Total Cache
- Go to Extensions and click the Settings link under the CloudFlare extension.
- Click the Authorize button under the Credentials:

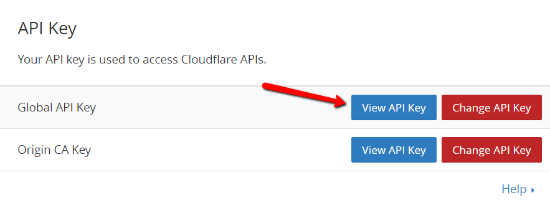
- Enter the email address for your CloudFlare account as well as your CloudFlare API key.
- You can find your CloudFlare API key by going to My Account and finding the API Key section:
Step 5: Turn on CloudFlare Minify
Now this is the final step.
After you save your credentials on the new screen you will see a list of settings. All you need to do is scroll down to the minification and configure as follows:
And that’s it. Now enjoy a very good speed for your wordpress website.
This is a very good tutorial for beginner. If you are a beginner this will save your time and your money
If you love our tutorial then you will love our support. If you need any help for speed up your WordPress website feel free to Message Us!
